A nice looking HTML and CSS only Theme Selector that requires no JS (with Astro).

Using the new customizable select and light-dark() with Astro to create a theme selector that requires no JS.
Note (updated october 2026)
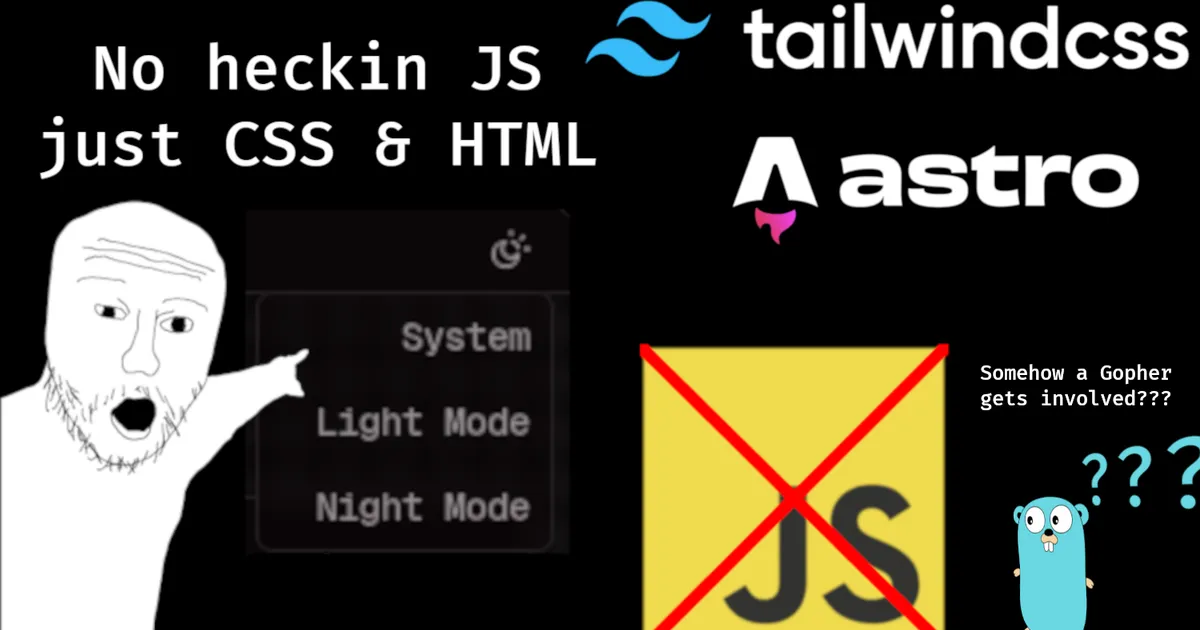
I’ve rewritten this post since I first put it up. Astro 7’s new compiler handles customizable select out of the box, so nobody has to compile anything anymore (sorry Gopher). I also dropped TailwindCSS for plain CSS and light-dark(), which ended up being simpler and a lot less code. If you’re still on Tailwind, there’s a section near the end for you.
When I first heard about Chrome’s Customizable Select, I knew immediately you could create really cool stuff without relying on component libraries like shadcn that do the difficult work of essentially reimplementing selects.
The really “cool” thing I wanted to do was create a theme selector that needs nothing, but CSS and HTML. Safari picked up Customizable Select in Safari 27, but unfortunately for my Firefox bros it’s still stuck behind a flag, so for now you’re stuck with the boring old select. Here’s its Bugzilla ticket for those interested.
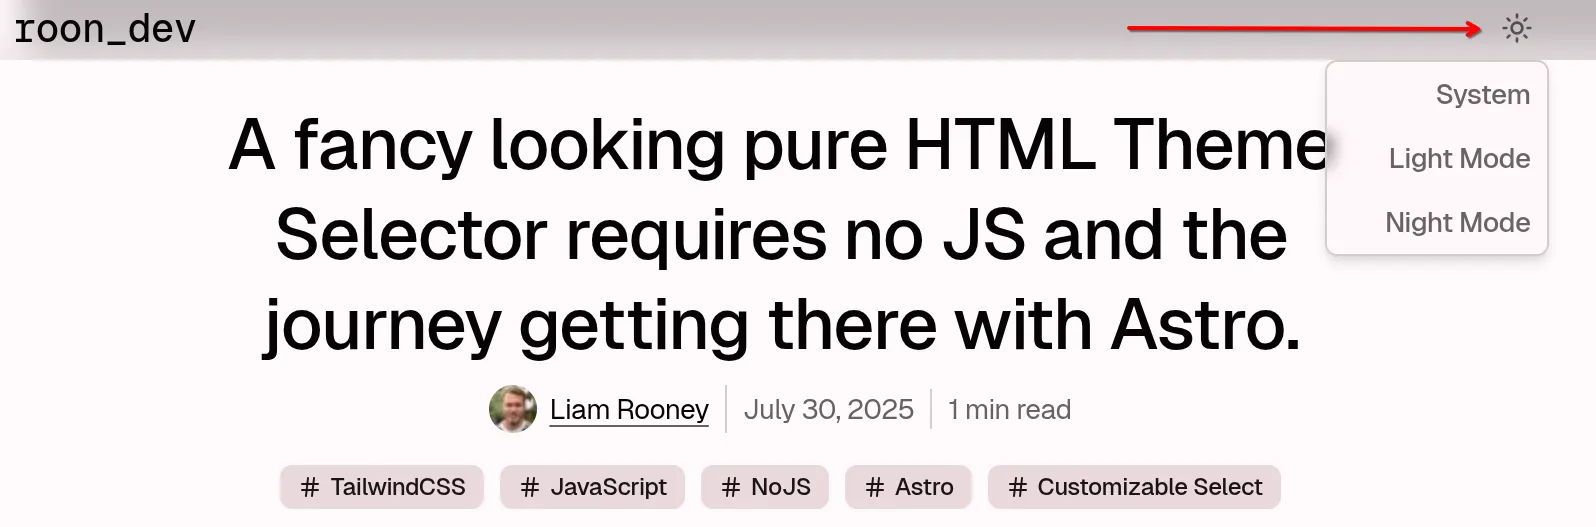
You can test it by using the selector at the top of the page!
For my Astro pals, this used to be a pain. The old Go compiler would “correct” the HTML inside the <select>, which broke the <button> and the icons in the options, so you had to compile the compiler yourself with the changes from #1070. #1083 never ended up getting merged, the Go compiler got retired instead, and the new Rust compiler in Astro 7 doesn’t correct your HTML anymore. So now it just works.
It does eat the closing </selectedcontent> tag for some reason, but the browser closes it for you so no harm done.
Setting And Persisting Color Scheme Preferences With CSS And A “Touch” Of JavaScript by Henry Bley-Vroman in Smashing Magazine laid the groundwork for my implementation.
Astro isn’t required for any of this, the select is plain HTML and everything else is plain CSS, it just fits nicely with Astro.
Below is the implementation used by this blog, just Astro and plain CSS. Most important to note is the use of appearance: base-select; which is the actual CSS that enables customization.
The var(--...)s are just this blog’s design tokens, swap in your own. Astro also imports SVGs as components now, so there’s no need for an icon library either.
---import DarkIcon from "@/assets/icons/theme/dark.svg"import LightIcon from "@/assets/icons/theme/light.svg"import SystemIcon from "@/assets/icons/theme/system.svg"---
<select id="theme-color-select" aria-label="Color theme" autocomplete="off"> <button> <selectedcontent></selectedcontent> </button> <option value="system" selected> <SystemIcon aria-hidden="true" /> <span>System</span> </option> <option value="light"> <LightIcon aria-hidden="true" /> <span>Light Mode</span> </option> <option value="dark"> <DarkIcon aria-hidden="true" /> <span>Night Mode</span> </option></select>
<style> #theme-color-select { font-size: max(16px, 1rem); color: color-mix(in oklch, var(--foreground) 60%, transparent); cursor: pointer; }
@supports (appearance: base-select) { #theme-color-select { &, &::picker(select) { appearance: base-select; }
12 collapsed lines
display: inline-flex; flex: none; align-items: center; justify-content: center; inline-size: 2rem; block-size: 2rem; padding: 0; border-radius: var(--radius-full); text-align: end; transition: color 150ms var(--ease-out), background-color 150ms var(--ease-out);
15 collapsed lines
&:focus-visible { outline-offset: 0; }
&:open { color: var(--foreground); background-color: color-mix(in oklch, var(--accent) 25%, transparent); }
@media (hover: hover) and (pointer: fine) { &:hover { color: var(--foreground); background-color: color-mix(in oklch, var(--accent) 25%, transparent); } }
&::picker-icon { display: none; }
&::picker(select) { --pad: 0.25rem;
position-area: block-end span-inline-start; position-try-fallbacks: flip-inline, flip-block, flip-block flip-inline;27 collapsed lines
min-inline-size: 7rem; margin-block: var(--space-3xs); padding: var(--pad); overflow: hidden auto; color: color-mix(in oklch, var(--foreground) 60%, transparent); background-color: color-mix(in oklch, var(--card) 25%, transparent); backdrop-filter: blur(var(--blur-xs)); border: 1px solid var(--border); /* Concentric with the options' corners inside the padding. */ border-radius: calc(var(--radius-sm) + var(--pad)); box-shadow: 0 4px 6px -1px oklch(0 0 none / 0.1), 0 2px 4px -2px oklch(0 0 none / 0.1); opacity: 0; transition: opacity 150ms var(--ease-out), overlay 150ms allow-discrete, display 150ms allow-discrete;
@media (prefers-reduced-motion: no-preference) { scale: 0.95; transition: opacity 150ms var(--ease-out), scale 150ms var(--ease-out), overlay 150ms allow-discrete, display 150ms allow-discrete; } }
14 collapsed lines
&:open::picker(select) { opacity: 1; scale: 1;
@starting-style { opacity: 0; }
@media (prefers-reduced-motion: no-preference) { @starting-style { scale: 0.95; } } }
option {37 collapsed lines
display: flex; align-items: center; justify-content: flex-end; gap: 0.5rem; padding: 0.375rem 0.5rem; border-radius: var(--radius-sm); font-size: var(--step--1); cursor: default; user-select: none; transition: color 150ms var(--ease-out), background-color 150ms var(--ease-out);
&:checked { color: var(--foreground); }
&:is(:focus-visible, :active) { color: var(--primary); background-color: color-mix( in oklch, var(--primary) 10%, transparent ); outline-color: transparent; }
@media (hover: hover) and (pointer: fine) { &:hover { color: var(--primary); background-color: color-mix( in oklch, var(--primary) 10%, transparent ); } }
&::checkmark, :global(svg) { display: none; } }
selectedcontent { display: contents;
:global(svg) { flex: none; inline-size: 1rem; block-size: 1rem; }
span {7 collapsed lines
position: absolute; inline-size: 1px; block-size: 1px; margin: -1px; overflow: clip; clip-path: inset(50%); white-space: nowrap; } } } }</style>Notice when we get down to the basics of the select, everything becomes styling rather than managing complex states in JavaScript or deeply nested divs to manage placement.
For example you can have the svg display in the select dropdown by changing the display in the css. The new customizable select enables making very elegant drop downs easily.
The one catch is that without JS your choice only lasts for the page you’re on, every new page starts back on System.
Tip (enhance with js)
Just because this doesn’t require scripting doesn’t mean it can’t be enhanced with some.
I used to use the Astro recommended nanostore and its persistence plugin for this, but it turns out a few lines in an inline script do the same job without a dependency. Put it right after the select:
<script is:inline> { const KEY = "preferred-theme" const select = document.getElementById("theme-color-select") const apply = (value) => { if (select.querySelector(`option[value="${value}"]`)) select.value = value } try { apply(localStorage.getItem(KEY)) select.addEventListener("change", () => localStorage.setItem(KEY, select.value), ) addEventListener("storage", (event) => { if (event.key === KEY) apply(event.newValue ?? "system") }) } catch {} }</script>Since it’s is:inline and sits right after the select, it runs before the browser gets a chance to paint the page, so you never see a flash of the wrong theme. It saves your choice to localStorage, listens for the storage event so your other open tabs follow along, and the try keeps it from blowing up when storage is blocked.
Now for the part that actually changes the colors. Instead of writing every color twice with a dark variant, give each color both of its values with light-dark() and let the select decide which one gets used by pinning color-scheme:
:root { --background: light-dark(oklch(0.99 0.01 0), oklch(0.1 0.01 0)); --foreground: light-dark(oklch(0.1 0.01 0), oklch(0.95 0.01 0)); --primary: light-dark(oklch(0.4 0.05 260), oklch(0.7 0.05 260)); /* ...the rest of the colors */
color-scheme: light dark;
&:has(#theme-color-select option[value="light"]:checked) { color-scheme: light; }
&:has(#theme-color-select option[value="dark"]:checked) { color-scheme: dark; }}Explanation (how it works)
The :has checks whether the root (which is always the <html> tag in the browser) contains the select with the given id and either the light or dark option checked, and if it does it pins color-scheme to that.
light-dark() then returns its first color when the color scheme is light and its second when it’s dark. When System is checked neither rule matches, so color-scheme stays light dark and the browser just follows your OS settings.
A nice bonus is that anything that already respects color-scheme, like scrollbars and the default form controls, follows along for free.
If you are using a component library like shadcn with CSS variables for theming, you’re most of the way there already. Instead of the separate .dark block prescribed by the shadcn docs, merge each pair of values into a light-dark():
:root { --radius: 0.625rem; --background: light-dark(oklch(1 0 0), oklch(0.145 0 0)); --foreground: light-dark(oklch(0.145 0 0), oklch(0.985 0 0)); /* ...the rest of the variables */}The first time around I had my dark mode variables copy pasted in two places, and I was always annoyed at having to double check that I was keeping them in sync. With light-dark() each color’s light and dark value sit on the same line, so you get a single source of truth for free.
Tip (still using tailwind)
There’s a few ways to wire this into TailwindCSS. Here’s all of them, the catches with each, and what I’d actually use.
1. Colors with light-dark(). Put both values of each color straight into your theme and you mostly don’t need dark: at all, bg-card and even bg-card/50 switch on their own once color-scheme is pinned like above:
@theme { --color-card: light-dark(oklch(0.98 0.01 0), oklch(0.13 0.01 0));}If you’re on shadcn, keep the light-dark() variables in :root like the snippet above and map them in @theme inline like you already do. The catch is that light-dark() only takes colors, so shadows, images or anything else that changes between modes still needs a variant.
2. A dark variant. For everything that isn’t a color, replace Tailwind’s default dark variant with one that follows the select:
/* change #theme-color-select to the ID if you've changed it */@custom-variant dark { &:where(:root:has(#theme-color-select option[value="dark"]:checked) *) { @slot; } @media (prefers-color-scheme: dark) { &:where(:root:has(#theme-color-select option[value="system"]:checked) *) { @slot; } }}The ampersand is the Nesting Selector, which the browser swaps out for the utility’s class, that’s the whole point of it. Tailwind 4.3 actually flattens it at build time now, so the CSS you ship already has the class in place, but it works out the same. The :where() matters: the version I originally had here didn’t use it, which gave every dark: utility the specificity of an ID and made them a pain to override. With :where() they’re as easy to override as any other utility, which is also how the Tailwind docs write theirs. The downside is the select logic now lives in two places, the color-scheme rules and this variant, so keep them in sync.
3. A style query variant. If you only care about recent browsers, set a --scheme next to color-scheme and the variant becomes one line, with the select logic in one place:
:root { --scheme: light; color-scheme: light dark; @media (prefers-color-scheme: dark) { --scheme: dark; } &:has(#theme-color-select option[value="light"]:checked) { --scheme: light; color-scheme: light; } &:has(#theme-color-select option[value="dark"]:checked) { --scheme: dark; color-scheme: dark; }}
@custom-variant dark { @container style(--scheme: dark) { @slot; }}Style queries have only worked everywhere since Firefox 151 (May 2026), and older browsers just never apply your dark: styles. They also check the parent’s value, so a dark: class on <html> itself does nothing.
What I’d use: 1 for colors and 2 for whatever’s left. It works in every browser with :has() and light-dark(), which is all of them since 2024. If you’re fine with only 2026 browsers, swap 2 for 3.
One caveat for all of these: Chromium re-checks :root:has() whenever any checkbox, radio or option on the page changes. I measured about a tenth of a millisecond per change on a typical page and it grows with the size of the page, so it only matters on huge pages full of form controls.
One more thing for my fellow Astro bloggers. If you use Expressive Code for your code blocks like this blog does, it can follow the select too. When I first wrote this I was patching Expressive Code to make it work, but you don’t need to, you can just hand it the selector:
export const ecOptions: SatteriExpressiveCodeOptions = { themes: ["github-light", "github-dark"], // Follows the theme <select> (see ThemeSelect.astro), falling back to // prefers-color-scheme while it's on "system". useDarkModeMediaQuery: true, themeCssSelector: (theme) => `:has(#theme-color-select option[value="${theme.type}"]:checked)`, // ...the rest of your options}Expressive Code sticks the selector onto :root, so the dark theme kicks in when Night Mode is checked and the media query takes care of System. This blog uses satteri-expressive-code, but the options are the same for astro-expressive-code.
Tip (multiple themes)
You could potentially define multiple themes by adding more values to the select. light-dark() only knows about light and dark, so for anything extra you override the variables when that option is checked:
:root:has(#theme-color-select option[value="forest"]:checked) { color-scheme: dark; --background: oklch(0.2 0.04 150); --foreground: oklch(0.92 0.03 140);}Setting a color-scheme too means everything you didn’t override still picks a sensible side. The possibilities are endless!
Now you have a theme selector that works, looks fancy, uses native HTML elements and can be minimally enhanced with JS.